

This is ideally what an American blade’s bevel should look like prior to honing. Note how far back the bevel goes, and its hollow form.
This is ideally what an American blade’s bevel should look like prior to honing. Note how far back the bevel goes, and its hollow form.
An excellent Italian machete from Rinaldi given a drop point and full regrind. The blade is distal tapered and fully forged construction, with a good hard, yet springy, heat treatment. The tapered stick tang is extremely stout, yet allows for a very dynamic balance that makes this heavy chopper lively in the hand.


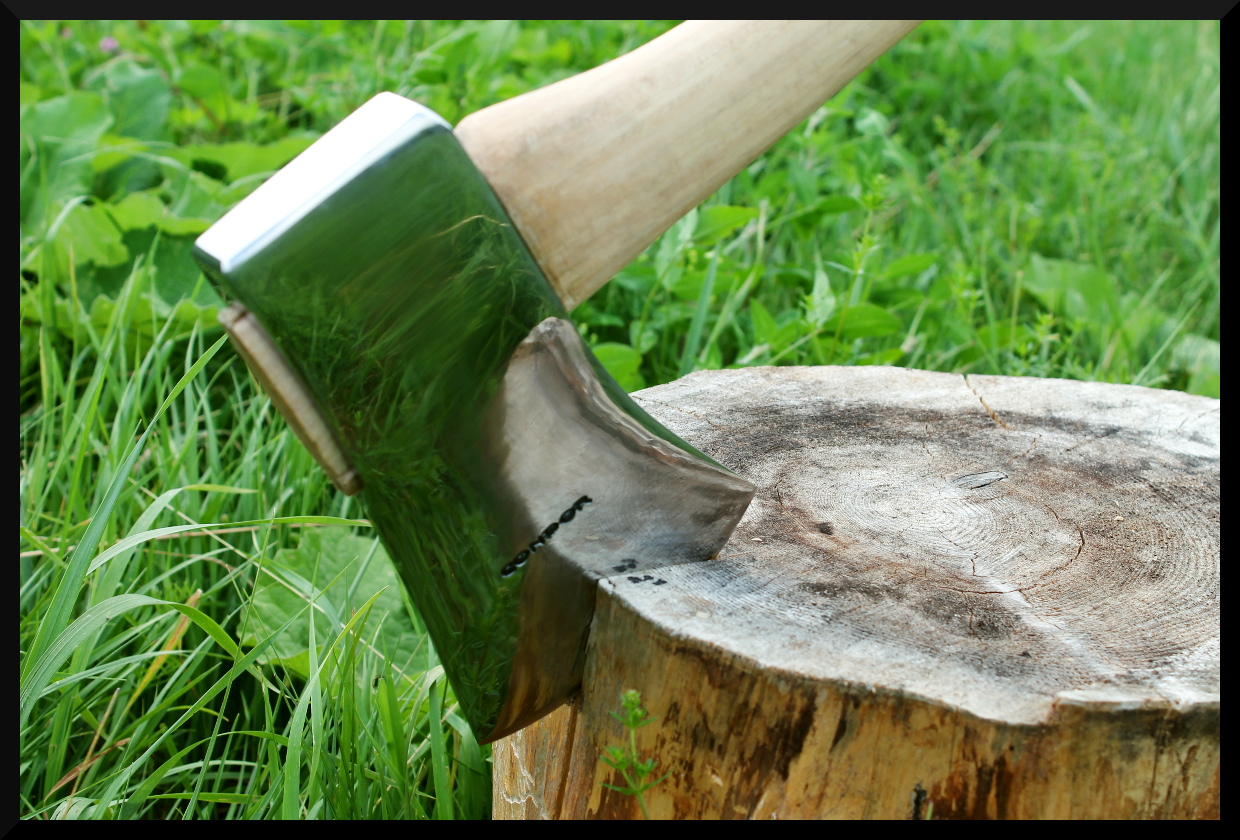
A Condor Michigan axe head ground and polished to a hazy mirror finish, and a high centerline ground in. The handle is an O.P. Link shaved down to shape.


New old stock laminated grass and bush blades, made in Sweden, imported by the Sandvik Saw & Tool Co. of New York, NY.


A fully restored and tuned Seymour Ironclad swing socket snath outfitted with an Emerson & Stevens “Clipper” grain cradle blade adapted for haying use. The snath has been significantly shaved down, the nib blocks replaced with ones of improved fit (the upper one having been modified for proper interface) and new grips installed on the original nib irons. The hardware has been electrolytically de-rusted and thoroughly cleaned, the whole tool having been given a protective clear coating.


Shown here is a 350g Rinaldi “Calabria” hand axe with a modified handle. A common complaint raised regarding slip fit handles is that (despite their virtues) a knob is either small or totally absent, meaning there is little or nothing to stop the hand from slipping off the end of the handle if a loose grip is used. A simple tapered cross-pin at the end of the handle creates a removable solution to this problem.
A tapered hole was bored with a small step drill and a wooden pin, tapered to match, driven into the hole. The single-sided pin with the projection to the outside of the hand is the most comfortable and secure arrangement vs. a finger-sided or double-sided projection, and if the head must be removed from the handle for use as an independent tool the wooden pin is easily driven out so it does not obstruct the removal of the head. This provides several notable advantages over the use of a lanyard: the user’s hands may slide freely along the handle as needed to adjust grip position, the handle may still be immediately released in the event of an emergency or accident, and the pin allows the end of the handle to be tucked under a belt and have it stay there nicely if the user’s hands need to be free without setting the axe on the ground.


Heel To Toe: 32″
Overall Length: 34 & 1/4″
Tang Angle: 17°
Weight: 1lb 7.8oz


Once in a great while we have a knife or tool come in that’s especially stunning, and this knife is one of them! Gorgeous figuring in those walnut scales. This is one Bushlore that’s dressed to impress!


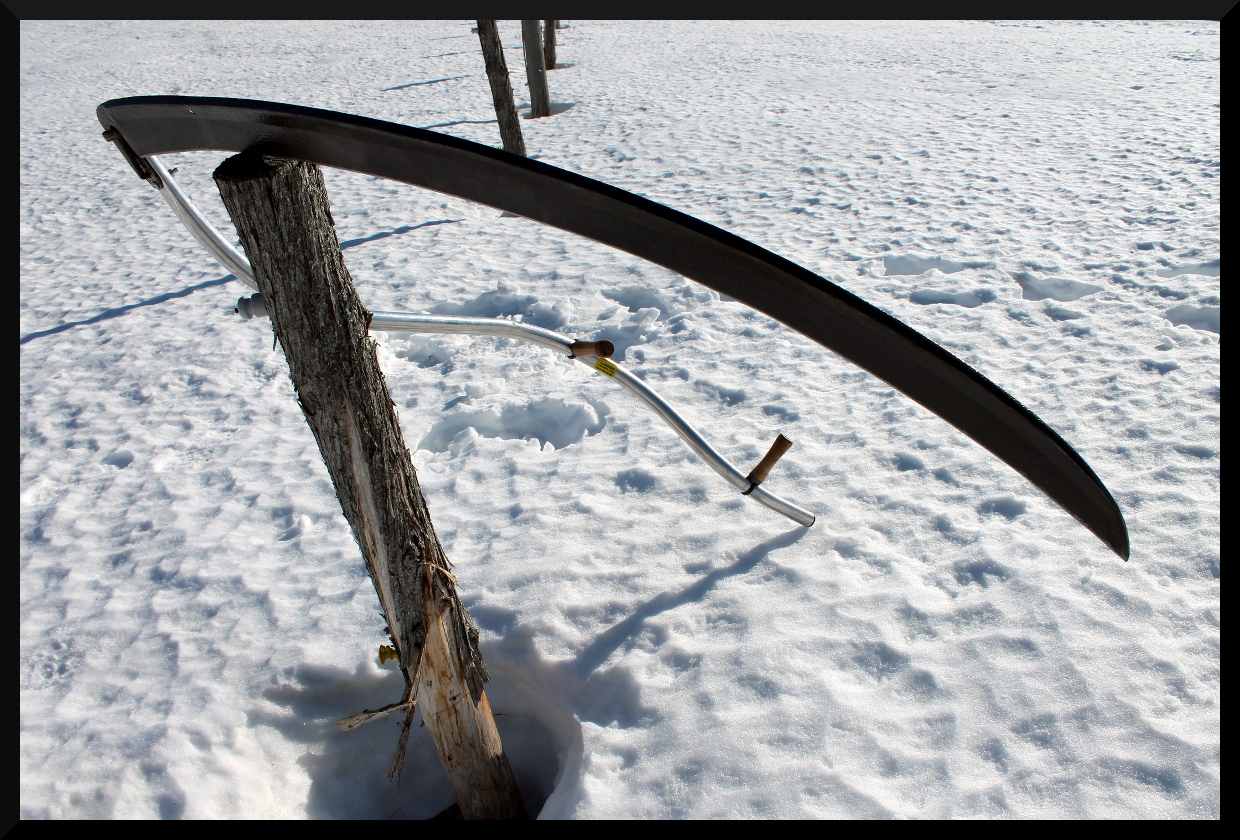
American pattern scythe blades traditionally come from the factory with the tang flat, and they are adjusted to the proper angle for the user and their snath by heating and bending for optimal mowing performance. This image series shows our method of going about it, using a Seymour Midwest Tools 30″ grass blade. If you do not have the tools necessary to perform the bending yourself, a local blacksmith, machine shop, or auto mechanic will likely be able and willing to perform the job.
The angle you will need will depend on your height, stance when mowing, the tuning of your snath, how much bend or “lift” there is in the neck of your snath (typically about 25° in most American snaths) and your intended mowing environment. In general a good rule of thumb is that the edge should ride about the thickness of your fingertip above the ground when in mowing stance. A lawn blade may need a slightly lower lay, and if mowing in very heavy or thick vegetation or on bumpy terrain a slightly higher lay may be preferred. See where your blade rides with the tang unbent and determine how much you want to lower it. This will be the amount of bend you’ll be introducing to the tang.

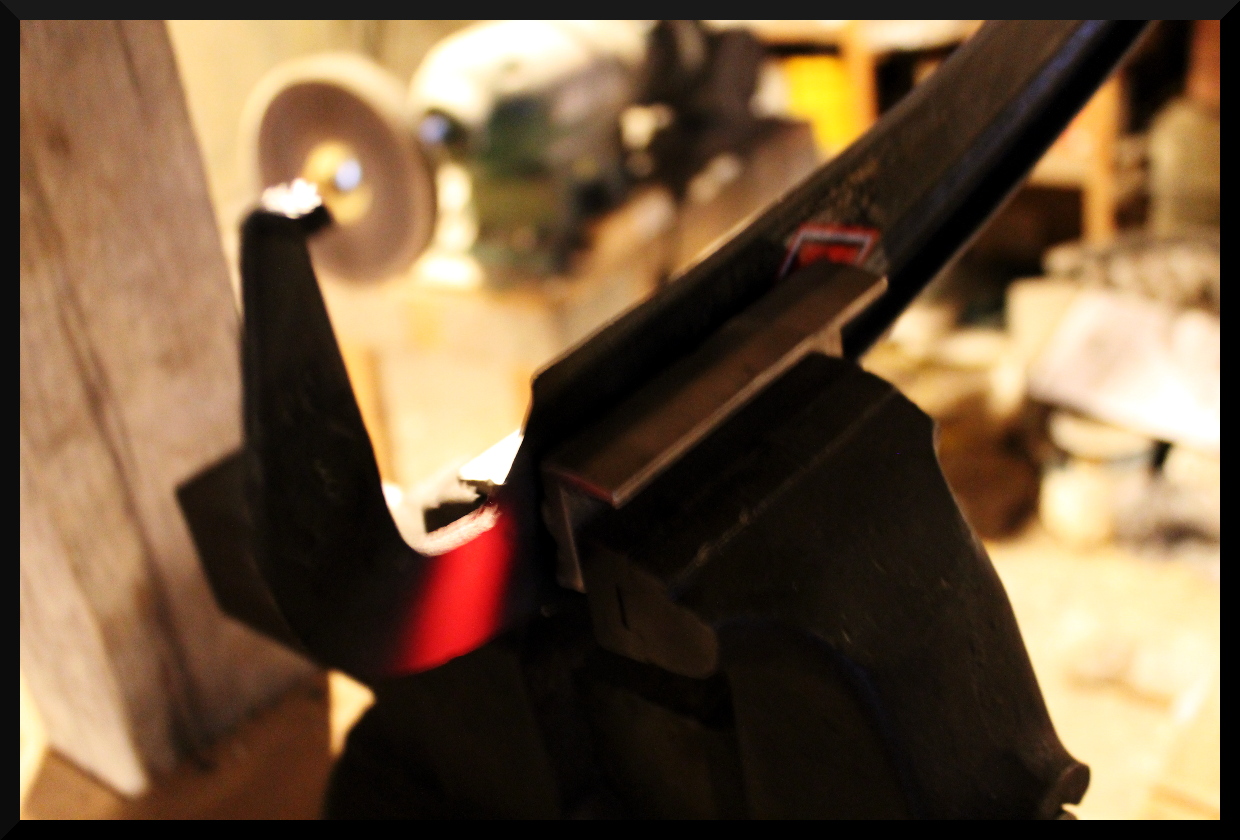
Clamp the blade securely in a sturdy vise. Care should be taken so that when the tang is torqued the strain is carried by the rib rather than the thin web of the blade (the span between the rib and the edge.) Here aluminum vise pads are being used both to appropriately manage the sites of pressure, but also to avoid marring the blade.

Heating the shank of the tang to prepare it for bending requires caution to avoid also heating the edge at the heel of the blade. We use an induction heater, which rapidly heats a narrow band of steel within the confines of its electromagnetic coil, but this is an option few will have. A torch (either MAP gas or oxy acetylene) is much more common, but greater care must be taken with them to mitigate heat migration away from the site of application. A raw potato can be stuck on the edge to shield it from the torch flame as it’s applied to the shank of the tang, or the base of the blade wrapped with a soaking wet rag to act as a heat sink. Try to keep the heat as confined to to the shank as possible, as this is where you want the bending to occur. Bring the metal to at least moderate red heat before attempting to bend.
Now that the tang has been brought to sufficient heat, twisting force needs to be applied to the tang to impart the desired angle of lift–what is known as the “cray” or the “tack” of the tang. A bending fork is the ideal way to do this (it makes it much easier to control the bend) but you can slip a pipe of appropriate dimensions over the tang to do the job as well.

The bending fork or pipe should be close at hand during the heating process so you can get it in position without losing too much of your heat. Apply your pressure in a smooth and controlled manner so you can gauge if excessive stress is being placed on the blade itself. If resistance becomes too great, reapply heat as necessary. It is ideal, however, to get the tang angle set in a single heat.

After bending, allow the tang to air cool–DO NOT QUENCH. Cooling the blade with water or by other rapid means would harden the steel, rendering it brittle. You want the metal to cool slowly so that it will be soft and tough to better resist strain during mowing, and prone to bend rather than snap if abused. Water may be pooled on the heel of the cutting portion of the blade after bending to act as a heat sink to protect against heat migration through the steel, ensuring the temper is not drawn out of the edge, but be careful not to allow it to boil up onto the tang portion where it could cause accidental quenching and hardening.


